Match Metal Roof Solar Mounting to Your Profile, South Africa
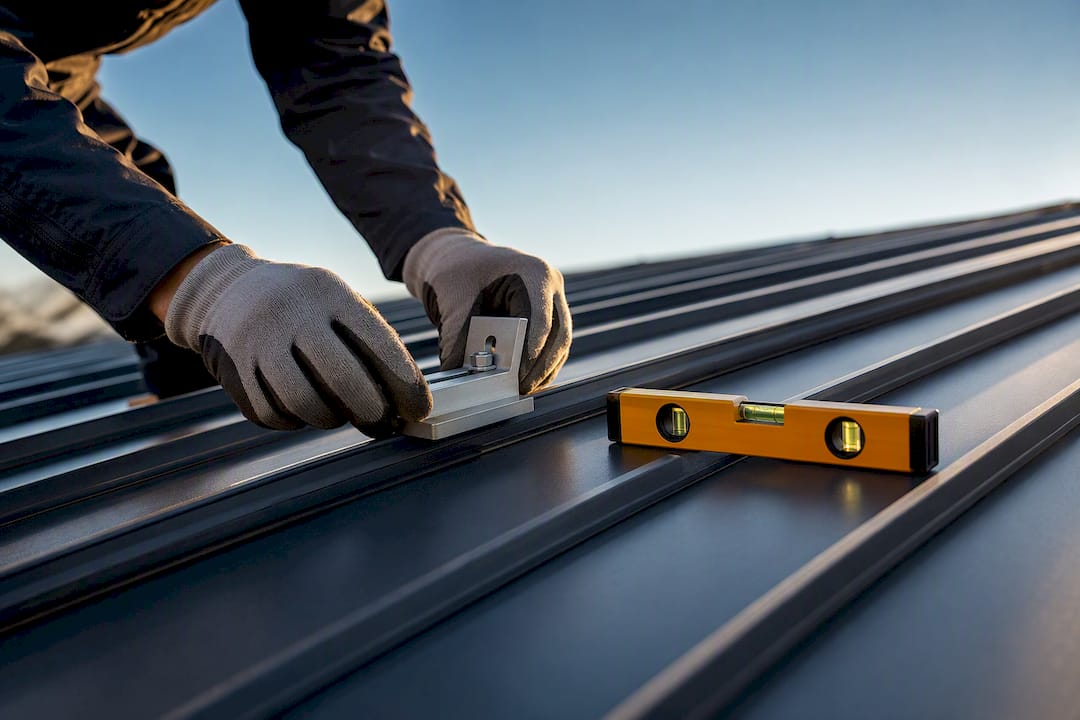
The right mounting method depends entirely on your roof profile, not on any universal kit: standing seam calls for structural clamps, corrugated and IBR need hook bolts or mini rail anchored into the purlins, and flat roofs usually favour ballast or sealed penetrations. Before anything else, confirm purlin centres and check the roof manufacturer's approved bracket list, then loop in SAPVIA-aligned installation practice for the rest.
*TL;DR:>
- Correct mounting method depends on roof profile, with standing seam favoring non-penetrative clamps and corrugated sheets requiring hook bolt systems for load transfer to purlins.*
- Installing on flat roofs with ballast is possible but adds dead load and requires structural capacity, especially on concrete decks.
- Bracket selection must match specific roof profiles; using generic solutions risks voided warranties and leaks, so detailed purlin spacing and manufacturer specifications are essential.
- Structural calculations are necessary for large, high-wind, or wide-span roofs to ensure safety and compliance, with required documentation including purlin plan and torque specs.
- Prevent corrosion by using compatible materials like aluminum rails with stainless steel fasteners, sealing all penetrations, and conducting regular maintenance inspections.
Table of Contents
- What's the difference between penetrative and non-penetrative solar mounting?
- Which brackets suit IBR, corrugated, Klip-lok, and standing seam roofs?
- What's the step-by-step process for installing solar mounts on a metal roof?
- When do you need structural calculations for a metal roof solar mount?
- How do you prevent corrosion on metal roof solar mounts?
- What should you ask an installer before they mount panels on your roof?
- Publisher perspective: choosing a spec-aware installer matters more than the brand of clamp
- Get matched with an installer who specs the mounting correctly
- Sources
- FAQ
What's the difference between penetrative and non-penetrative solar mounting?
Penetrative systems use hook bolts, rails, or lag screws that pass through the roof sheet and anchor into the purlin below. Non-penetrative systems, including standing seam clamps, railless brackets, and ballasted trays, grip the roof profile itself or simply sit on top of it without breaking the surface.
Each has a real trade-off, not just a marketing angle.
- Penetrative (hooks, bolts, rail): Strongest load path when installed correctly, but every fixing point is a potential leak if sealing fails, and it can complicate roof warranties from the sheeting manufacturer.
- Non-penetrative (clamps, railless, ballast): No holes means no direct waterproofing risk, and it's often faster to install, but it depends on a roof profile that's actually built to be clamped, like standing seam. Try it on the wrong profile and the clamp can slip or crush the rib.
- Ballast (flat roofs): Avoids piercing the waterproofing membrane entirely, but it adds significant dead load and only works where the roof structure and membrane condition can handle it, a decision that depends heavily on ballast versus penetrative fixings for flat concrete roofs.
As a selection rule: standing seam and Klip-lok favour non-penetrative clamps because the profile geometry is designed for it. Corrugated and IBR sheet, being thin gauge, need the load taken through to the purlin with hook bolts. Flat concrete decks lean toward ballast unless the roof condition and load capacity rule it out.
Which brackets suit IBR, corrugated, Klip-lok, and standing seam roofs?
Bracket choice is not interchangeable across profiles, and treating it as a one-size problem is the fastest way to void a roof warranty or create a leak point. Here's how the main South African roof types break down:
- IBR and corrugated sheet: Use hook bolt systems or a mini-rail that clips over the rib and fixes straight into the purlin. The sheet metal itself is too thin to carry panel and wind load, so the load must transfer to the purlin, never rest on the sheet alone.
- Klip-lok and other concealed-fix profiles: Use approved non-penetrative clamps designed for that specific rib shape. Never seat a clamp directly over a sheet clip; datasheets typically call for a minimum 100mm clearance to allow thermal movement.
- Wide-deck profiles (Brownbuilt, Zip-Tek): These need profile-specific clamps or engineered brackets. A clamp datasheet for KT-PV, BB-PV, and ZT-PV systems sets out exact rib placement and torque values for each variant.
- Standing seam: Use structural seam clamps that grip the raised seam mechanically, with zero penetrations. Torque and clamp clearance matter here more than on any other profile, since an over-tightened clamp can deform the seam.
Purlin spacing decides how many brackets you need and how long your rail runs can be. Wider purlin centres generally mean more brackets per panel row, not fewer, to keep deflection within limits.
What's the step-by-step process for installing solar mounts on a metal roof?
Getting this right is less about heroics and more about sequence discipline. Skip a step and you'll find out during the next heavy storm.
- Pre-install: Inspect the roof for corrosion or existing damage, measure actual purlin centres (don't assume they match the plan), and confirm the bracket you've bought matches the exact roof profile and wind exposure zone.
- On-roof layout: Mark out bracket positions before drilling or clamping anything, working off the purlin grid rather than eyeballing panel spacing.
- Fit hardware to spec: Install hooks or clamps exactly where the manufacturer's datasheet says, torquing fasteners to the specified value, for example roughly 15 Nm on M8 cap screws in GRS's clamp installation guidance.
- Seal and flash: Any penetration gets proper flashing and sealant, not just a bead of silicone over a bolt head.
- Post-install checks: Recheck torque after initial settling, run a water test on penetrations, confirm bonding and equipotential connections, and route cables tidily clear of ponding areas.
Pro Tip: Keep the manufacturer's clamp datasheet on-site during installation. Installers who eyeball rib placement instead of measuring the clearance from sheeting clips are the most common cause of clamp slippage six months later.
The recurring mistakes worth watching for: mismatched bracket and profile combinations, skipping the purlin measurement step and trusting the drawing, under-torqued bolts, missing flashing at transitions, and mixing incompatible fastener metals that trigger corrosion.
When do you need structural calculations for a metal roof solar mount?
Not every installation needs an engineer's sign-off, but plenty do, and skipping that step on a large or exposed system is where things go wrong.
SANS 10160 sets the wind and structural load framework relevant to roof-mounted arrays, and SAPVIA's installation guidance is explicit that mechanical mounting and electrical work must be coordinated, with a structural check and module allocation plan prepared before racking goes up.
Larger arrays, wide-span roofs, and coastal high-wind sites are exactly where a generic bracket count stops being good enough. If the roof spans further between purlins than the bracket manufacturer's default spacing assumes, or the site sits in a high-wind coastal zone, get a structural calculation done rather than guessing.
When you're vetting a quote, ask for three documents in writing: the mounting manufacturer's spec sheet for your exact profile, a purlin spacing plan showing bracket positions, and the torque specification sheet. If the installer can't produce these, that's your signal to ask more questions before signing.
How do you prevent corrosion on metal roof solar mounts?
Material mismatch is the quiet killer of mounting systems, showing up as rust stains and loosened clamps two or three years after everyone's forgotten about the install.
- Use aluminium rails paired with stainless-steel fasteners as the default combination for most residential jobs.
- Avoid direct contact between aluminium and untreated steel; galvanic corrosion between dissimilar metals accelerates fast without an isolating washer or coating.
- Specify corrosion-grade fasteners and coated brackets for coastal or industrial sites, where salt air or airborne chemicals shorten hardware life significantly.
- Seal every penetration and hook fixing with a proper flashing detail, not just sealant alone, and check that seal annually.
- Build in a maintenance interval, ideally an annual roof and mount inspection, to catch loosening fasteners or coating wear before they become leaks.
What should you ask an installer before they mount panels on your roof?
A competent installer should be able to answer these without hesitation, and a vague answer here is worth more than any glossy brochure.
- Which bracket or clamp will be used for your specific roof profile, and why that one over alternatives?
- How will the load transfer to the purlins, particularly on IBR or corrugated sheet?
- Which sealing products will be used at every penetration point?
Before signing, require the mounting manufacturer's spec sheet, a purlin-centre plan showing where fixings land, the torque and fastener specification, and proof of insurance or workmanship warranty. Treat a "one kit fits every roof" answer, a missing bonding plan, or an installer who can't produce a spec sheet as a hard red flag. Comparing quotes side by side gets easier once you've seen residential installation scopes that spell out exactly what's included.
Publisher perspective: choosing a spec-aware installer matters more than the brand of clamp
Roof-profile mismatches are rarely a hardware failure. They're usually a specification failure, an installer who quoted the same kit they used on the last job without checking the purlin spacing or profile underneath. Installer directories and quote-matching tools exist to connect you with installers who ask the right questions before they climb onto your roof, not after.
— Kobus Kohvik
Get matched with an installer who specs the mounting correctly
There are services that help you get matched with installers experienced in working with IBR, corrugated, Klip-lok, and standing seam roofs to avoid the guesswork in mounting specifications.

Start by running your system size through the solar calculator to scope the job, then use request a free quote to get matched installers to send through their mounting spec sheet and purlin plan alongside the price. If you want to browse options by area first, the installer directory by city is the fastest way to see who's active near you before you request anything.
Sources
- Rooftop solar mounting structure South Africa — Axe Struct
- GRS clamp datasheet (KT-PV, BB-PV, ZT-PV)
FAQ
What is the 33% rule for solar panels?
The 33% rule generally refers to keeping roof-mounted arrays within a portion of the total roof area to preserve structural margins and access paths; the exact figure varies by jurisdiction and installer standard, so confirm the applicable rule with your structural sign-off rather than assuming a fixed percentage.
What are the best brackets for mounting solar panels on a metal roof?
There's no single best bracket: hook bolt systems suit IBR and corrugated sheet by transferring load to the purlin, while structural seam clamps suit standing seam roofs without any penetration. The right choice always depends on your specific roof profile.
What is the best solar roof mounting system overall?
The best system is the one engineered for your exact roof profile and confirmed against your purlin spacing, not a single product marketed as universal. Matching bracket to profile, as Valsa Engineering's bracket guidance notes, matters more than any brand name.
What are the three main types of solar panel mounting?
The three broad categories are penetrative rail or hook systems, non-penetrative clamp or railless systems, and ballasted systems used mainly on flat roofs. Roof type and structural condition determine which one applies.
My clamp feels loose after installation, what should I check first?
Check that the clamp sits on the correct rib and clear of any sheeting clip, since clamps mounted too close to a clip can shift as the roof expands and contracts. Re-torquing to the manufacturer's specified value, often around 15 Nm on M8 fasteners, resolves most early loosening issues.